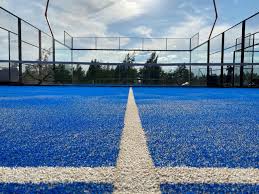

DIY Padel Court A Comprehensive Guide to Building Your Own Padel Court at Home
Padel tennis is one of the fastest-growing sports worldwide, combining elements of tennis and squash while being accessible to players of all ages and skill levels. With its rising popularity, many enthusiasts are considering the exciting option of building their own DIY padel court. This guide outlines the essential steps and considerations for creating your very own padel court.
Understanding Padel Court Dimensions
Before diving into the construction process, it's crucial to understand the dimensions of a standard padel court. A regulation padel court is 20 meters long and 10 meters wide, surrounded by walls that are either glass or solid materials. The height of the back walls is typically 3 meters, while the side walls stand at 4 meters. It's essential that your chosen location has enough space not just for the court but also for safe play, which includes a buffer zone around the edges.
Choosing the Right Location
The location of your padel court is a key factor to its success. Ideally, it should be flat and well-drained to prevent water accumulation, which could damage the court surface. Consider factors such as sunlight exposure and wind direction, as these can impact the playing experience. Local zoning laws and permissions should also be checked, as you may need permits for construction.
Materials and Equipment Needed
Building a padel court requires a variety of materials
1. Court Surface The surface material can vary; many opt for artificial grass or asphalt with proper cushioning for player safety. 2. Walls Depending on your budget and aesthetic preference, walls can be constructed from materials such as glass, concrete, or mesh. 3. Net A central net divides the court and is similar to a tennis net but specifically designed for padel. 4. Lighting If you plan to play during the evening, installing floodlights is essential for visibility.

Construction Process
1. Preparing the Ground Start by leveling and clearing the area where your court will be built. Ensure that you have a solid foundation, typically involving a base layer of gravel or sand for drainage, followed by the chosen surface material.
2. Building the Walls Erecting the walls comes next, which requires careful measurement. If using glass, specialized installers may be necessary to ensure safety and stability. For solid walls, consider a height that meets the regulation standards.
3. Installing the Net The net is crucial in defining the playing area. Install it at the center of the court, ensuring it has enough tension and height (usually 88 cm) to allow for proper gameplay.
4. Finishing Touches Once the primary structure is complete, add essential accessories. This can include padding around walls, lighting fixtures, and benches for players.
Maintenance and Care
After constructing your DIY padel court, ongoing maintenance is essential for longevity and performance. Regularly check for surface wear, clean debris off the court, and inspect the walls for any damage. Proper upkeep will ensure that your court remains a fun and safe place to play.
Conclusion
Building a DIY padel court can be a rewarding project for sports enthusiasts looking to enjoy the game at home. With careful planning, the right materials, and a solid understanding of the construction process, you can create a padel court that will provide hours of enjoyment for you, your family, and friends. Dive into the world of padel and experience the joy of playing on your very own court!
Premium Paddle Tennis Rackets for Every Court & Player
Premium Padel Courts: Expert Design & Installation Services
Premium Padel Courts: Panoramic Designs & Custom Builds
Premium Padel Court | Custom Designs & Quality Installation
Paddle Tennis Rackets: Unleash Power & Precision on Court
Best Paddle Tennis Rackets: Power, Control & Comfort